
Gauge
Pod Inserts for '94 - 2001 Mustangs !
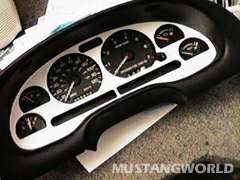

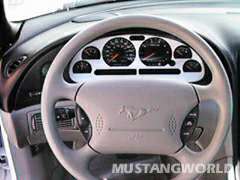
Photo of gauge inserts in white on factory stock gauge pod '96. Gauge
pod lit up.
Install update notes 10-1-99:
We have simplified the install to basically be 1) Remove the outer bezel. 2) Stick on the pod using a small amount of soapy water. No removal of the gauge pod electronic unit or lens is needed. We'll be updating this install to illustrate this new procedure. You can read below to get an idea of what how the product is installed however.
Another
Mustangworld Speedshop Original.
Here's a unique product that allows you to have a colored gauge pod that's
long lasting and without painting. They are stick on which allows you
to change your mind and peel it off in the future. They are easy to install
and come in many colors.
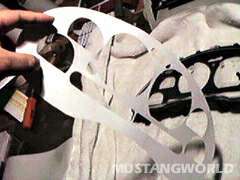
Gauge insert close up.
That's
right, they install ON TOP of the clear pod cover !
We spent many hours designing the kit so that it can be installed ON TOP
of the clear plastic lens and not obscure any of the gauges in the pod.
This allows for a much easier installation and gives your factory gauges
a deeper custom look ! More on why we designed it this way after the install.
Let's go ahead and install one.
NOTE: Many people have installed the gauge pod inserts WITHOUT removing the pod. They were just VERY careful not to spay the pod with water, but rather lightly spray the gauge pod insert itself and stick it on the pod while it's in place in your stang. If you are going to to this, make sure you don't spray water onto the pod electronics and be careful. But it may save you some time because you do not have to remove the gauge pod from the stang.
Installation:
|
The first step is to remove the gauge pod itself. More info on this can be found in our White Face Gauge How-To. We suggest you read it first on how to remove the pod and remove the pod cover plate. Note: Practice re-installing the pod at this point ! See what it will take to maneuver the pod back into place. Top first and tilt-wheel full down. |
 |
|
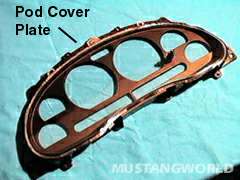
Separate the pod cover plate from the gauges. This is what we will be working on. The clear lens is fused to the plate and very hard to remove without special tools, so our kit applies on top of the clear lens. It looks surprisingly good and very unique on the outside. |
 |
|
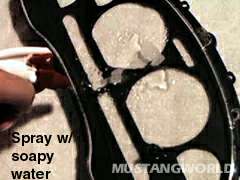
Now spray the whole face plate down with a soapy water solution. Don't worry about getting water inside the pod, we'll be rinsing everything after the install is complete. |
 |
|
Spread the soapy water solution around to have all areas on the clear face slick. |
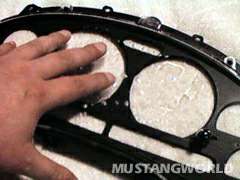 |
| Using two hands, carefully peel back the gauge inserts. Do this nice and slow. You can spray the sticky surface with soapy water as you peel if you feel you need to. | 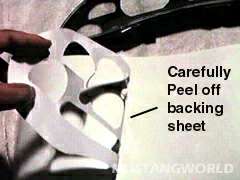 |
|
Now carefully lay the insert onto the clear lens. You want to slide it back and forth to make sure the soapy water get's under the inserts to allow you to align it. Spray more soapy water on it if you need to. |
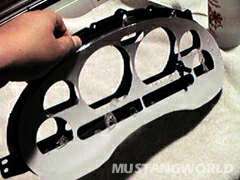 |
|
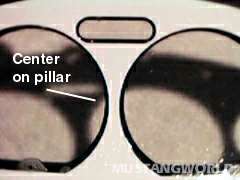
You need to align the insert is only 2 places to get a good fit. Position yourself at an angle to the faces. Center the middle up with the black pillar while standing looking at the pod dead center. |
 |
|
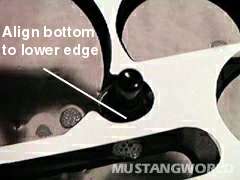
The height of the insert can be adjusted to suit your taste. We aligned the the insert so that it is almost touching the bottom of the trip reset button. If it's touching it, it's too high. You want it "just" not touching the reset button. This adjustment needs to be checked on the pod to be sure it's where you want it. |
 |
|
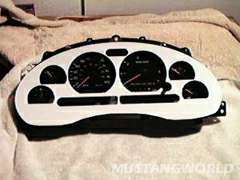
Make sure the pod cover you are working on if fairly dry on it's underside, then lay it on the pod. Check to see that you can see all the gauges and that everything is viewable from an "in front" seating position. Again make sure it's not too wet when you do this ! If you find that it's off you can peel and re-stick it by using the soapy water again. |
 |
|
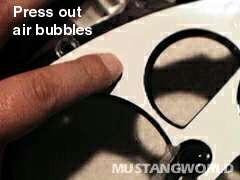
Once you know the insert is down where you want it, you can begin gently pressing out any air bubbles you might see. Continue to press out bubbles as the insert dries. |
 |
|
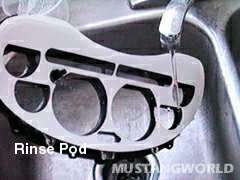
ONCE IT'S DRY, (a few hours later) you can rinse the pod cover gently under a sink. You can basically rinse the entire cover plate at this point, inside and out. The COVER ONLY not your entire electronic gauge pod of course !! Gently dry the pod cover with a towel to avoid water spots. Make sure water is drained from the spring area on the trip reset switch. |
 |
|
Now just re-attach the cover to the gauge pod and re-install the pod into your stang. Make sure it's 100% dry. CAREFUL ! Treat the insert with the same care as you would treat the clear lens surface. You want to TAKE YOUR TIME when reinstalling it, avoid scratching the insert and the clear lens. Hopefully you practiced this (like we mentioned in step 1). |
 |
Extra
notes:
It
Installs on the outside of the cover !
Our first design was for the gauge inserts to stick to the black ABS
plate itself. However we ran into a snag that we believe everyone
out there will also run into below:
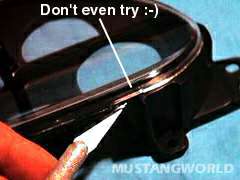
The Clear Plastic cover is "fused"
to the ABS back plate !
Our kit installs on top of the clear plate because of this.
Ford did a great job fusing the clear plate to the black ABS plastic. Removing the clear lens plate without damage is something that most people might find hard to do. You can't pry it off because the clear plate will crack. It will have to be cut off with a tool or with a hot wire, etc. We wanted to keep the installation as simple as possible.
If you have questions about the gauge inserts for your model stang please email us here.

That's it !
Now go out and enjoy your ride !

|
MUSTANGWORLD.COM,
the Mustangworld crest logo above and MOLLERNET are registered
trademarks of MoLLER DIGITAL / DiscMEDIA INC. Copyright ©
1986 - 1998 MoLLER DIGITAL. Some web elements on this site are
copyrighted and are being used with permission from their respective
owners. MUSTANGWORLD web elements may not be "re-posted" on any
website anywhere in the free world without permission from MoLLER
DIGITAL INC. All original graphics are digitally watermarked to
aid us in copyright enforcement. |