
DOOR
JAMZ !
For 94 - 99 Mustang Coupe and Convertibles
(power windows and non-power window versions available)
Here's a unique product that allows you to have colored arm rests in your
stang for a fraction of the cost of a traditional trim kit and without
painting.
They are also easy to install and for about the same price as a large pizza you can add a custom look to your stang !
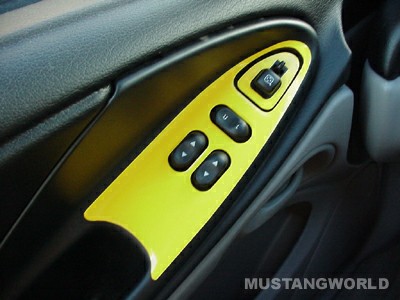
Door Jamz driver side
shown in yellow w/CLOSED loop above mirror control.
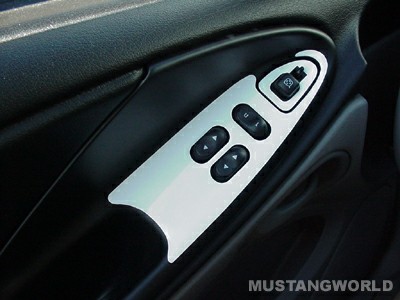
Door Jamz driver side
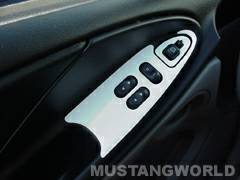
shown in white w/OPEN loop above mirror control.
What
you get in the MW Door Jamz kit:
The kit includes a colored clock pod insert (1), arm rest inserts for
the driver (2) and passenger side (1). The driver side includes a 2 piece
design with a floating mirror control joystick insert that can be installed
as well. BOTH the open loop and closed loop designs for the driver side
are included in the kit ! This is because our tests show that some might
find the closed loop version a little harder to install, so we included
both. So you can install either version of the driver side because you
do get both in the kit.
Note: All the pieces in the kit are the SAME COLOR (clock pod and armrest inserts), in the how-to below we show a white and a yellow kit.
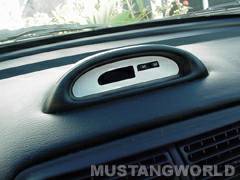
Also includes matching
clock pod insert for stangs that have it.
Let's go ahead and install a set.
Installation:
|
Carefully peel the insert from the backing sheet and spray with soapy water. You can also fill up a glass of soapy water and dip it in. Get the Door Jamz insert wet with this solution. |
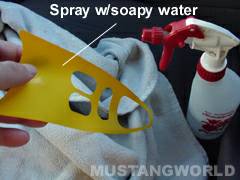 |
|
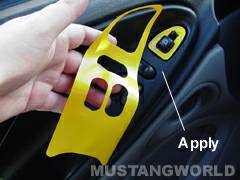
Next apply the insert to the arm rest area. Shown in the pic is the mirror joystick control piece already installed. Note: The convertible kit has a different layout of the buttons. The kit shown here is for the Mustang coupe. |
 |
|
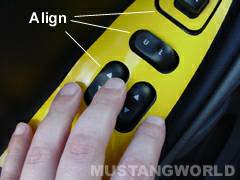
Now align the buttons for the door lock and window controls. You can slide the insert around as you need to. The CLOSED LOOP version might be harder to install for some, but it can be done fairly easily, just take your time and you will get it just right :-) |
 |
|
As the insert dries you will NEED to press out the bubbles AS it dries. Best to use one finger to hold it in place and another to press any bubbles out to the edges of the insert. If you found you messed up, you can peel and re-stick the insert at this time as well (while wet). Note here the mirror joystick piece can be removed if you want for different looks (shown in photo removed). |
 |
| Again as it dries, make sure to press out any remaining bubbles. Here is the completed CLOSED LOOP driver side insert in yellow. | 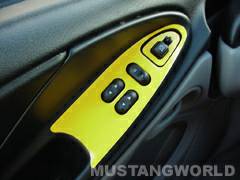 |
|
Here is a photo of the OPEN LOOP driver side insert in white. If you find the closed loop version to hard to install, you can install the open loop. We call this "open loop" because you might notice at the top of this insert it looks like a coat hanger (open loop). |
 |
|
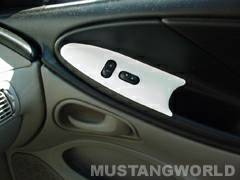
Here is the passenger side MW door Jamz insert (in white). In the kit you get all the same color. In this how-to we showed different colors. |
 |
A
customized Stang for about the same cost as a large pizza !
The MW Door Jamz kit matches our Gauge
pod insert kit nicely. Our goal with the Door Jamz kit design
was not to compete with $400 wood or real carbon fiber trim kits,
it was to offer the enthusiast a cheaper (but very effective) alternative
to getting a custom look in their stang. Also, remember removal is
as easy as peeling them off, there is no permanent adhesive to worry
about. They do a good job of protecting the upper arm rests from greasy
hands and soft drink spills as well !
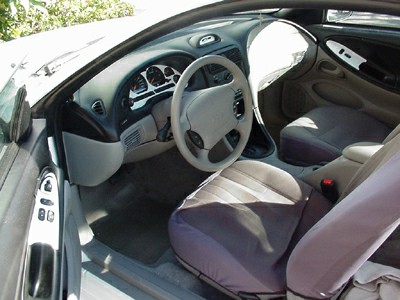
MW Door Jamz and Gauge pod insert kit. Gauge
pod kit sold separately.
That's it !
Now go out and enjoy your ride !